Friday 7 August 2020

Severn Wheelhouse

 Not untypically for me, I've lost track of time and can't quite believe it's been 3 months since my last post.  I've also realised that I have far fewer photos of the build than I thought.

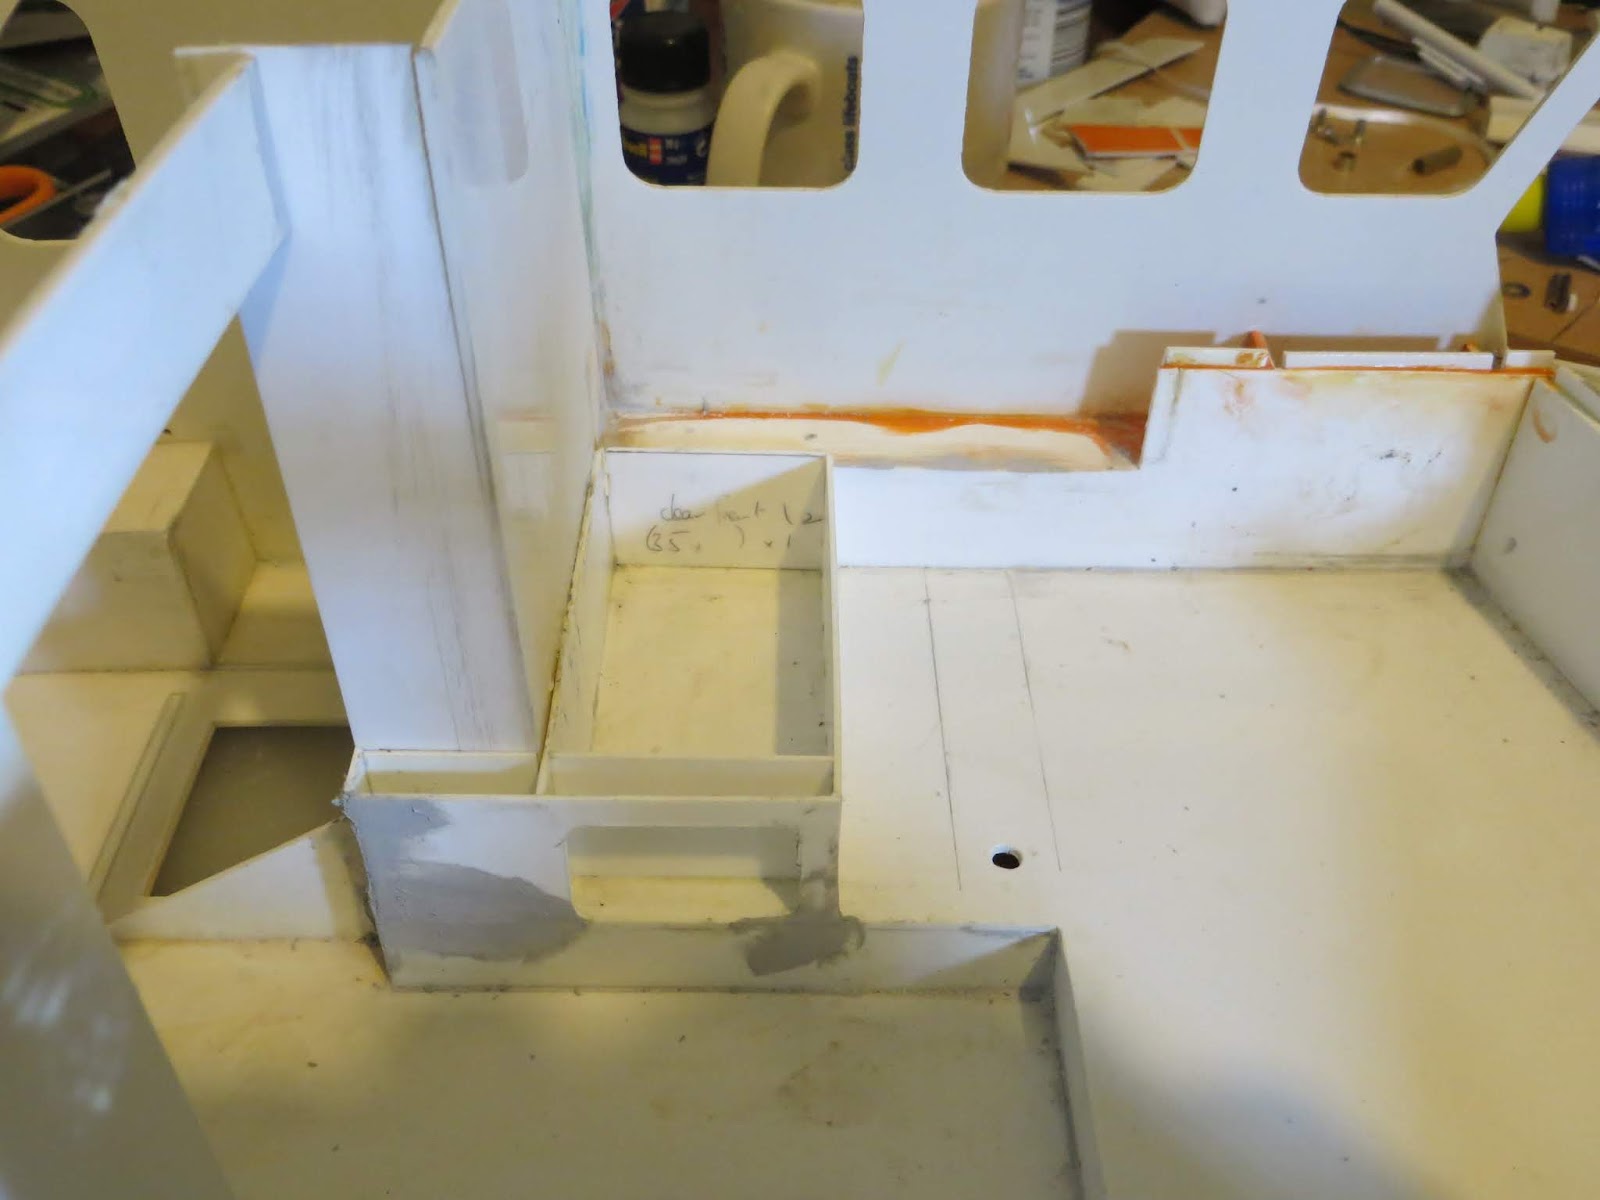
Having finished my mods to the wheelhouse subassembles, I moved on to add some extra detail.  This has mainly been to add to the navigator's equipment but also to other bits and pieces not least the hot water boiler for hot drinks!


I've also added a few extra details to the seats, such as seat belts and the adjustors as well as various electrical boxes.  As well as adding detail, they add a little colour to the black white and grey interior.


Sunday 10 May 2020

Severn - wheelhouse main mods

Having looked at the reference photos that came with the kit, and visting Weymouth lifeboat, I decided that some of the wheelhouse subassembles needed a few substantial modifications. 

 Starting on the port side, the kit has simplified to build an approximation of the various storage boxes and trunking and vent housing.  So I set about cutting down the sub assembles to shorten the forward portion of the vent housing and completely removing the forward part of cabin sub-assembly.

Moving to the starboard side, I lowered the blanking panel over the cabin vents and behind the stretchers and added a recess in the vent trunking for the stretcher supports.  Also, as a result of the mods to both sides, I had to lengthen the supporting frames.

At the front, I altered the raised floor as it's not raised on the starboard side and built up the port side for the crew seat bases - there's also a recess within the seat base.


With that done, next time will come the start the the cabin detail.

Saturday 18 April 2020

Severn Beginnings

Of course I knew that I'd been building my Severn along side my Tamar for sometime - I just hadn't realised just how long the builds had been going together until I checked the photo dates!  I started building the wheelhouse in September 2015!!

Here's a few photos to show the main wheel house components;
 One thing that concerned me from the start was making sure I could paint all of the various recesses properly.  With everything assembled I though the paint might not cover inside them properly.  So, I masked up the cabin floor and painted the recess bases orange as well we the recess/vent hosuing sub assemblies.
 These are most of main cabin sub-assemblies before I started modifying them.  That's for another post!
I've got a long way beyond this and so am along way behind with this blog.  Next time, I'll look at some of the mods I made to the wheelhouse interior and some of parts I scratch built.

Sunday 1 September 2019

All Done (for now)

My Tamar is finished - well nearly!

Here's some pictures of the finished boat.


I still need to finish the fendering as some of the joints aren't good enough, try to get some more depth markings as the ones I have are too big and to finish the Y-Boat

Eventually, I'm intending to remake the wheelhouse - I've bought the parts to build another one from Model Slipway.  It's because I'm not happy with the shape of some of the parts on the wheelhouse itself and because some of the detail's been lost due to the number of coats of paint I put on!!

Now, it's on to my Severn kit and then the Shannon.


Sunday 17 February 2019

Mast(erblaster) part 5

After another period of frustration, I feel like I'm making progress again.  The mast is on and the lifting mechanism working (for now...see below).

I've remade the hinges from brass (with the help of my friendly milling machine owner).  They were machined down from brass square to a rectangular profile, turned on the lathe to make locating pins and then shaped with a files.

The hydraulic cylinder brackets are also brass and the hydraulic cylinders made from aluminium tube.

The mechanism is a mini servo with a borden cable attached which runs out of the wheelhouse and then through the 'dummy' hydraulic cylinder.  I had to modify the servo mounting as it was too low and left too much unsupported bowden cable.  I'm also not convinced this mechanism is robust enough...   Even with an Action Servomorph, there's not quite enough travel to lower the mast fully so it's supported by the dummy hydraulic cylinders - the while weight is on the bowden cable.  So on a drive to the lake with the mast lowered (as it's too tall to fit in the car, the bowden cable kinked and so was then useless.  I've since tried brass rod but it's too stiff for the servo to drive.  I've since found that With the mast lowered slightly it will fit in the car so for the time being, I've reverted to a replacement bowden cable.  I'm hoping that with the mast lowered only a little, most of the cable will be supported and so is less likely to kink; time will tell.  Otherwise, the only idea I have left is to make a linear servo as the bowden call will then run on a straighter line rather than the arc of the servo arm.

Anyway, here's a video of it in action...


Saturday 22 September 2018

Close the Door


I have been making progress and after too many years, I've nearly finished my Tamar.  One of the biggest tasks recently has been getting the transom door opening mechanism working, and also the mast lifting mechanism.

The transom door was first and now works.  It's operated by a sailing arm servo, attached to a square brass tube to which the 'hydraulic' rams attach.  The rams rum through the square tube and are adjustable at that end.  I had initially considered trying to also fit dummy hydraulic cylinders to but that would have been very complicated and they're inboard anyway so barely visible.

This is the mechanism


...and this is the door in operation.

The deck hatches are also on.  I used miniature hinges rather than the kit parts.  The hatches were heated and shaped to the deck curvature before cutting into the four parts.  the next job here is to make hinges to attach the moving 'bridge' piece that spans the gap between the boat and open transom door.

Saturday 18 August 2018

A long time coming

I'd forgotten just how long it's been since I posted!  After a long time getting frustrated about just how inconsistent my spray painting must be, I've finally got a decent finish on the wheelhouse.  So that's meant I've spent the autumn and winter attaching the fittings.

This is where I've got to;


There's still a lot to do.  I need to remake the mast hinges because the plastic ones I made aren't up to the job.  The replacement brass tube one I made also failed.  So, these will be made from brass square milled down to the correct section and then pinned in place.

Next on the agenda is the fendering...